


Table of contents
1. First of All, Generate a VPC:
What is a VPC?
A virtual private cloud is an on-demand configurable pool of shared resources allocated within a public cloud environment, providing a certain level of isolation between the different organizations using the resources.
Woah! That was pretty complex, right? it's not just keep reading this blog these buzzwords can't scare us!!
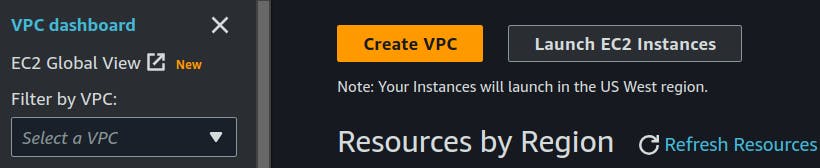
Let's go then, search for VPC in AWS services and click that `Create VPC` button.

here we are assigning a CIDR block (IP address range) of 10.0.0.0/24
means we have the first 16 bits frozen so here we have 255*255 total possible IP addresses, learn more here:
2. Now We are gonna create subnets

what is a subnet?
A subnetwork or subnet is a logical subdivision of an IP network. The practice of dividing a network into two or more networks is called subnetting.
To keep it simple we are gonna create just 2 subnets:
Public Subnet
Private Subnet
Give a read about the properties of both of these from the image above, although we will discuss them further in this blog itself.
Just go over to the Subnets section in the VPC dashboard and click `Create Subnet`.


Here we defined the 10.0.0.0/24 block (256 ips) for Public Subnet and Availability Zone us-west-2a.
We can Define multiple Availablity Zones for better availability.
Similarly, we will create a Private Subnet with 10.0.10.0/24 CIDR Block which will also have 256 possible IP addresses.

NOW we have 2 Subnets created!

3. Create an Internet Gateway
We will attach this Internet Gateway directly to our Public Subnet to give access to the internet, it will act as ISP (internet Service Provider).

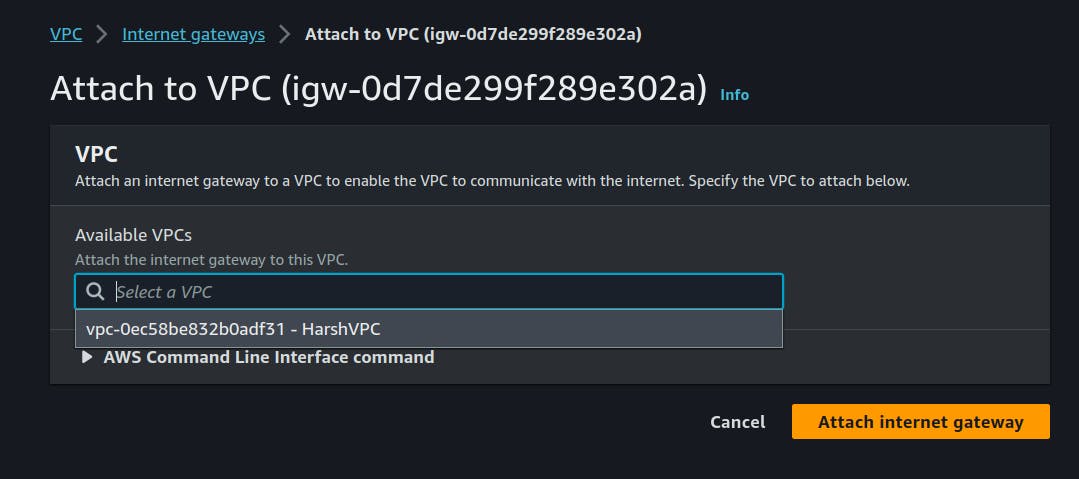
Click that `create internet gateway` button.


We have our gateway created now we will attach this to our HarshVPC.
4. Create Route Tables:
we are gonna create 2 Route Tables defining routes for our individual Subnets:

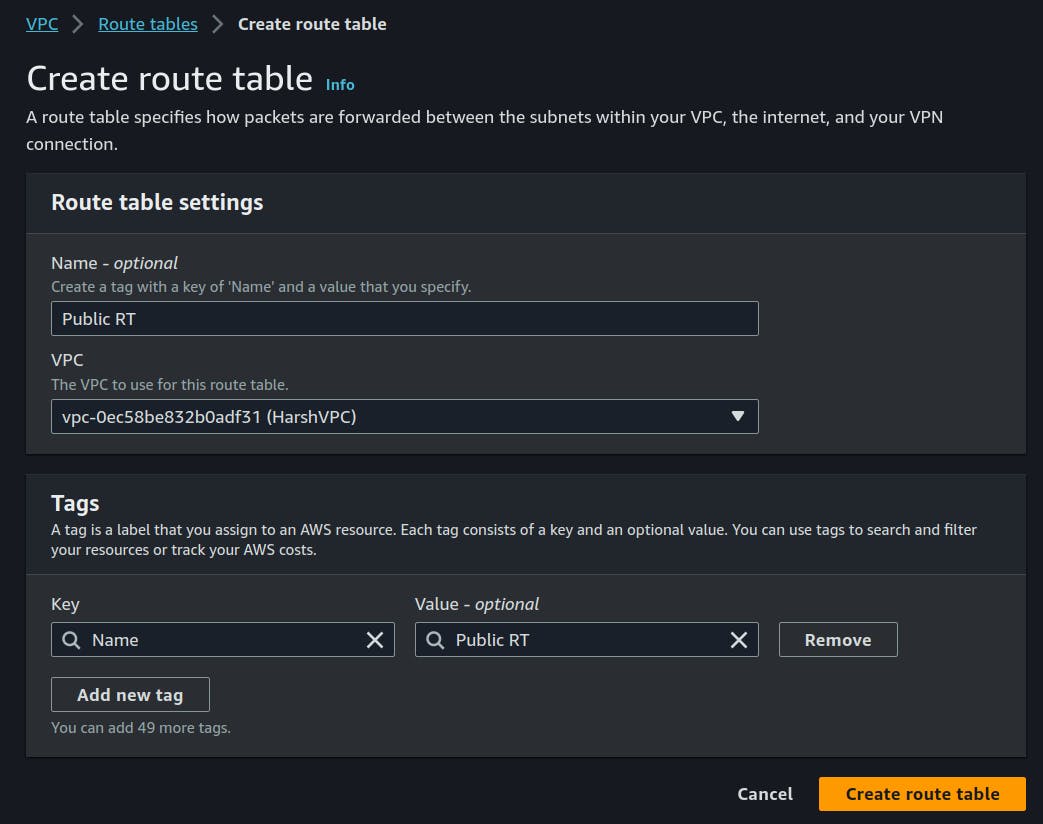
Generating Public RT
Now we have some default routes defined for local interaction, we will add new ones.

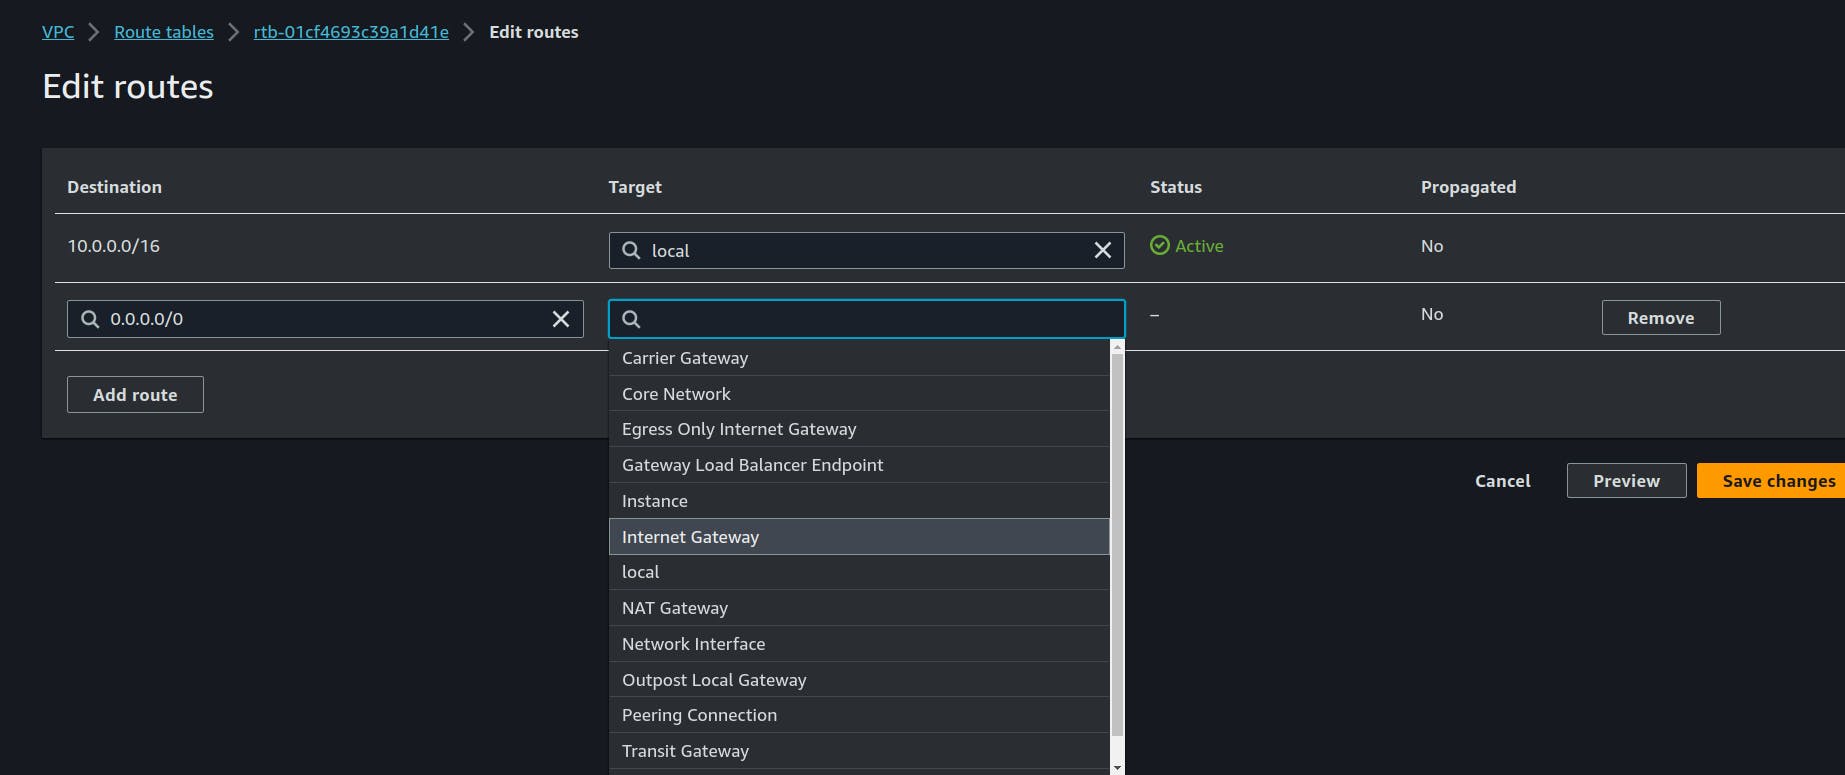
Here we defined the route destination to 0.0.0.0/0 means everywhere on internet target is using Internet gateway (IGW) which we just created above.
5.Create Security Groups
Security Groups are similar to Firewalls for our Virtual Private Cloud, there's a difference in that you can define multiple security groups for a single machine which you can't with firewalls.


we have allowed all kinds of traffic from anywhere in our Public Subnet.
This type of configuration is not meant to be done production Environment,
here are some points to be noted from :
When learaning:
permit everything with relaxed settings.
slowly tighten the knobs and controls.
When designing for production:
lock everything down to begin with.
slowing open and relaxing only on as-needed basis.
need to know/need to access.
When learning:
Truly understand how things work by completely messing security settings.
meticulously compare with a functional multi-tier architecture.
Simillary we will create a Private Security Group - there allow traffic from public subnet only because we don't want a bad guy to connec to our machines in private subnet.
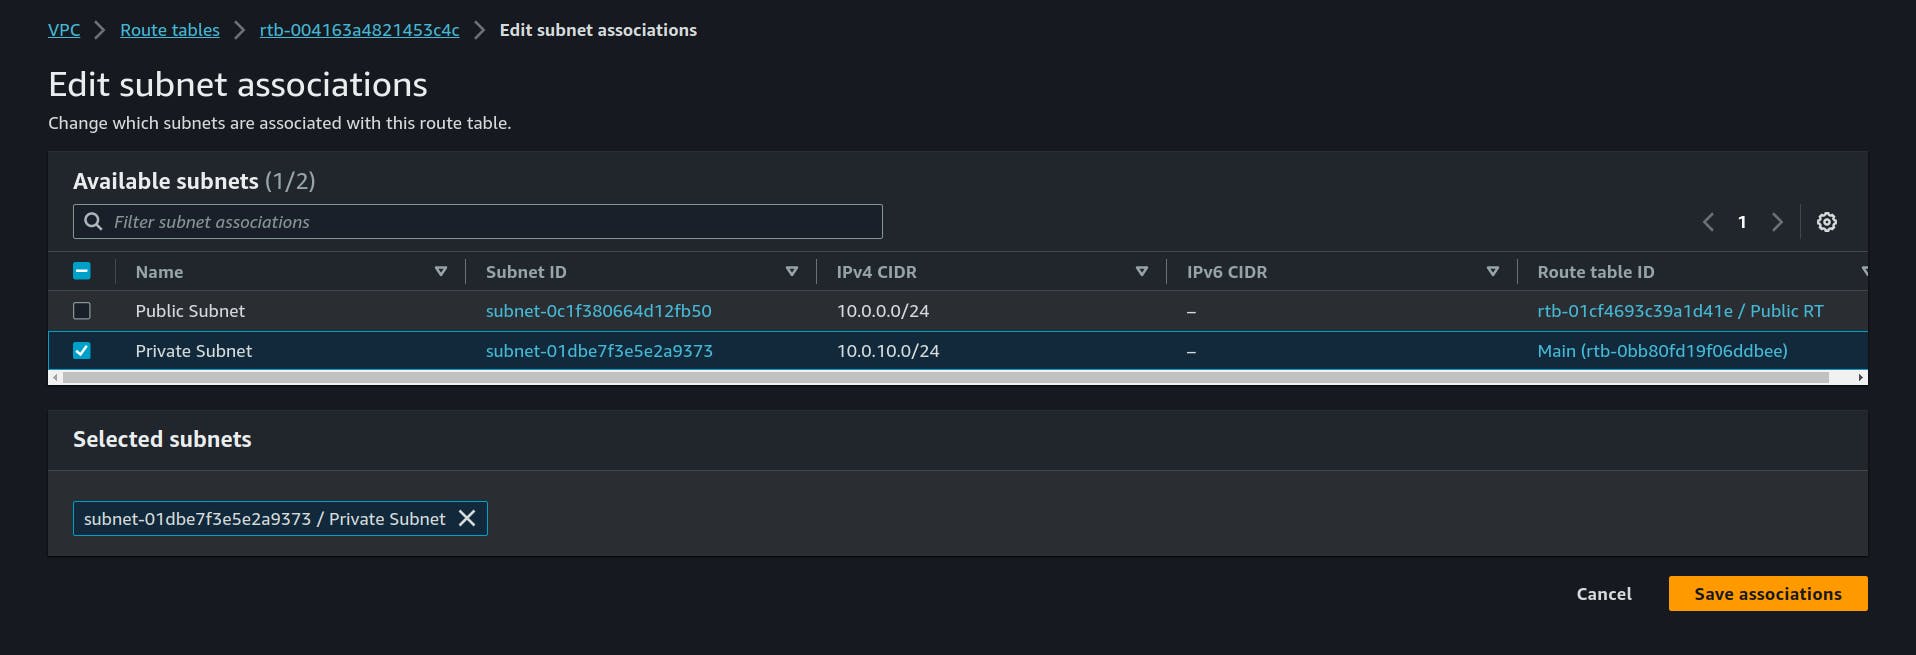
6. Subnet Association:
we haved created the Route Tables but we haven't associated them to which subnet they belong.

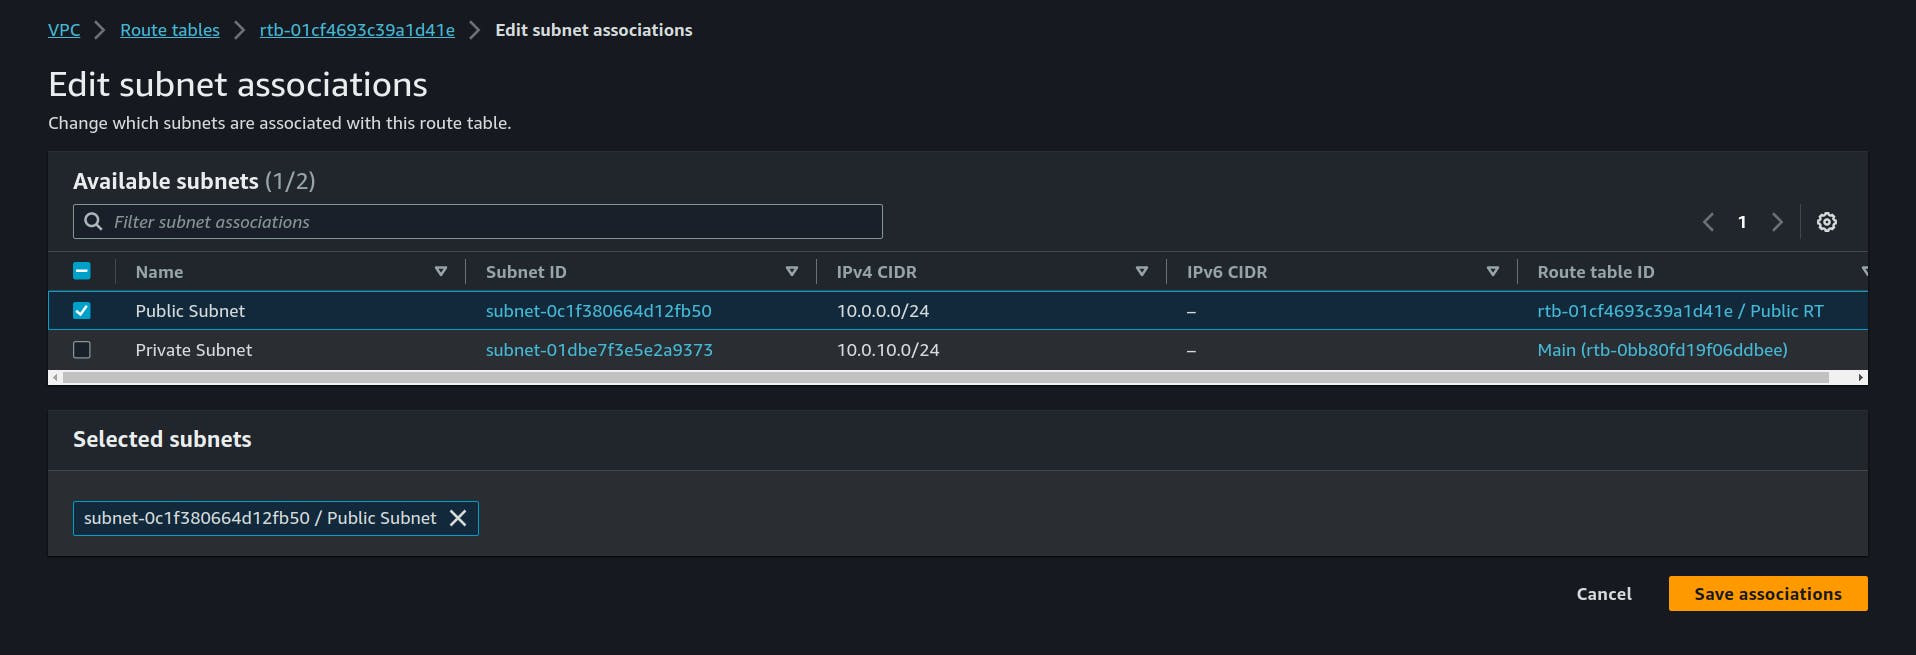
Just like this associate the Private RT to private Subnet.
7. Creating Instances
Now it's time to put some actual machines into our VPC and try it out.

head over to EC2 Section.
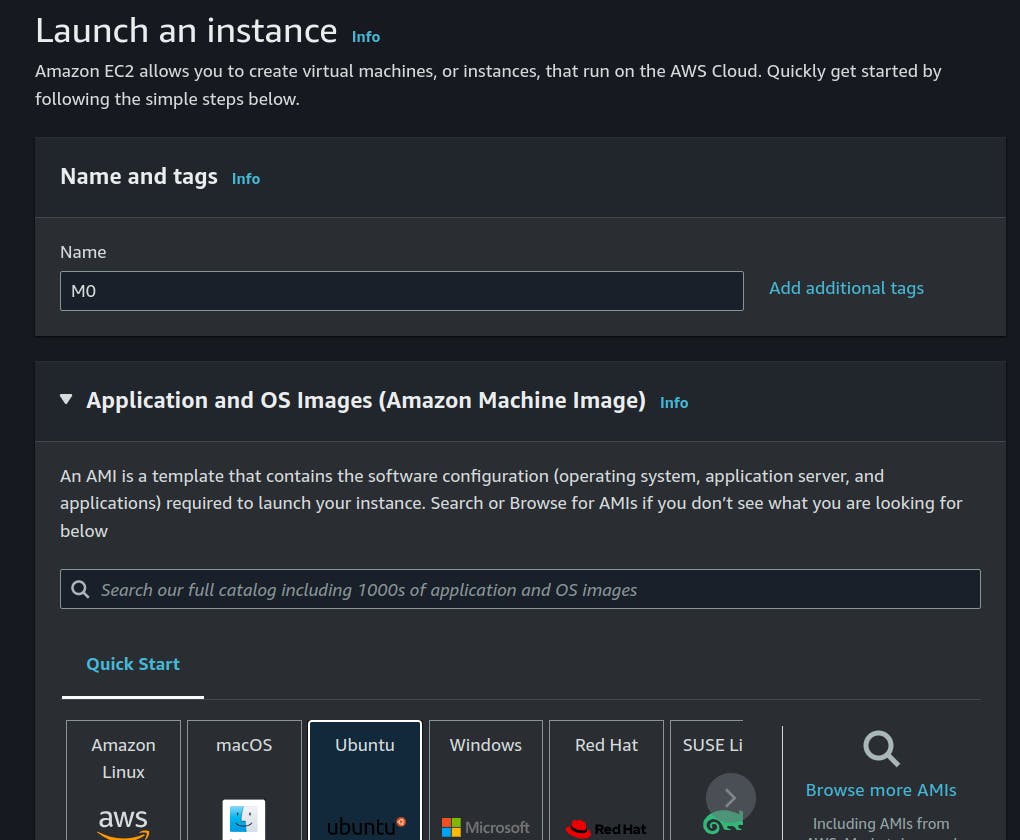
we are creating this machine M0 in our Public subnet to act as a Router/NAT/bastion.

Here we give your public ssh key which you have locally on your machine.
in my case it's id_rsa which is available in ~/.ssh/id_rsa.pub

Here are the Network Settings :
we our HarshVPC, Public Subnet, we have enabled the public IP to and the Public Security Group we created all of these before.
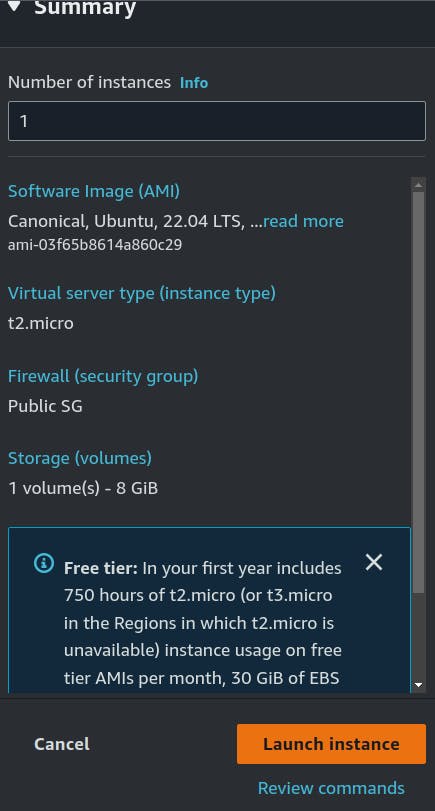
Now we will launch the M0 Instance.


Similarly, we will create the M1 Machine in our private subnet with Private Security Group and public IP disabled.

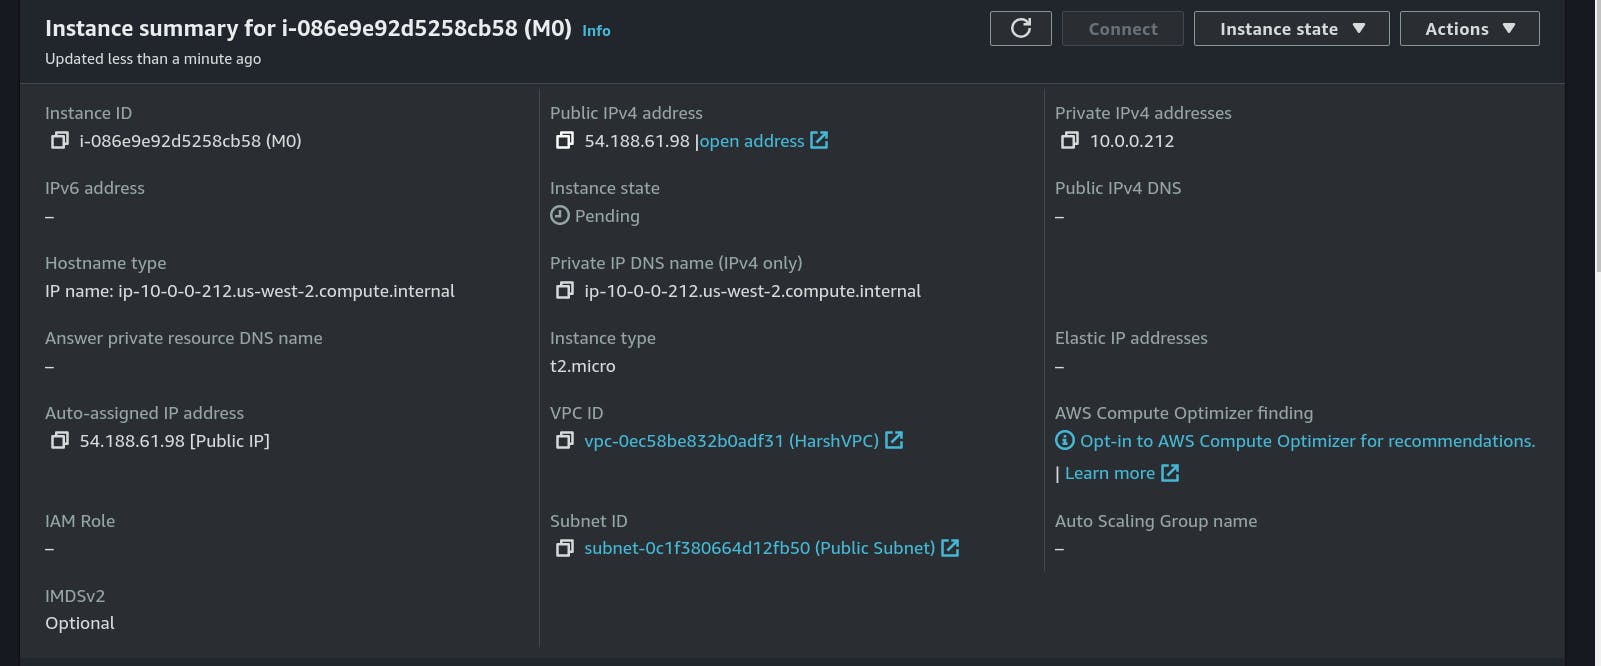
Here we have a public IP of our M0 machine available in the Public Subnet, Let's try connecting with SSH.
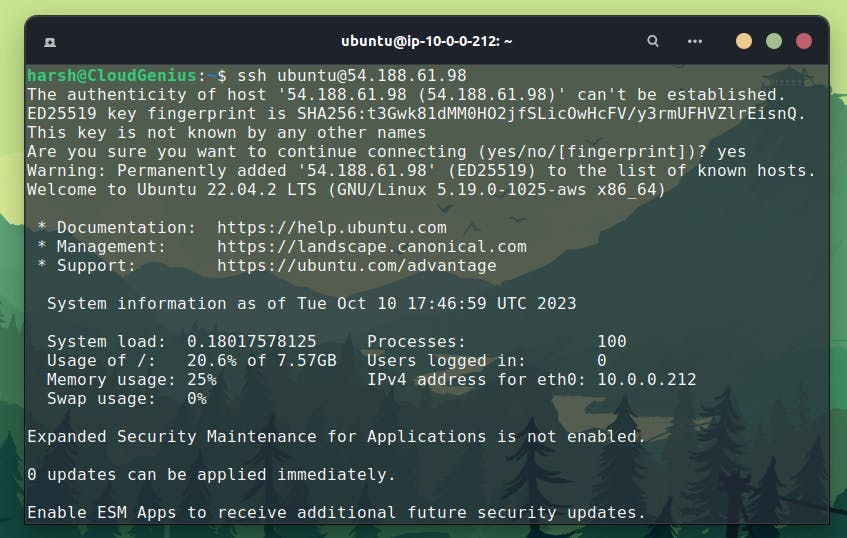
Hurray we are in !!!
8.Converting Instance into NAT
*we will execute these commands on a remote instance*
We want to connect to our M1 private machine, but it doesn't have a public IP and its subnet only allows local traffic, so we will use M0 as a jump box or bastion to connect to the M1 machine.
first, we have to convert M0 into NAT, we are already connected via SSH we just need to execute the following commands.
sudo iptables -t nat -A POSTROUTING -o eth0 -j MASQUERADE
echo 1 | sudo tee /proc/sys/net/ipv4/conf/all/forwarding
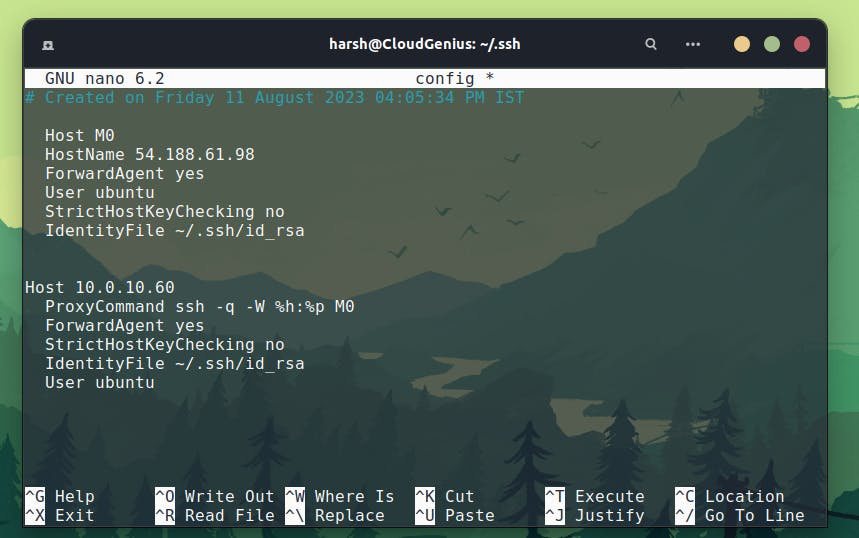
9. Setting Up SSH config file for Jump
*we will configure this file locally*
here we defined our bastion as M0 and below that we have our private M1 machine with its private local IP, just there we have a proxy command that will use M0 to help us connect to M1.
this config file is present at ~/.ssh/config in your local computer

Let's GOOOO we did it we connected to a private machine via some other machine.
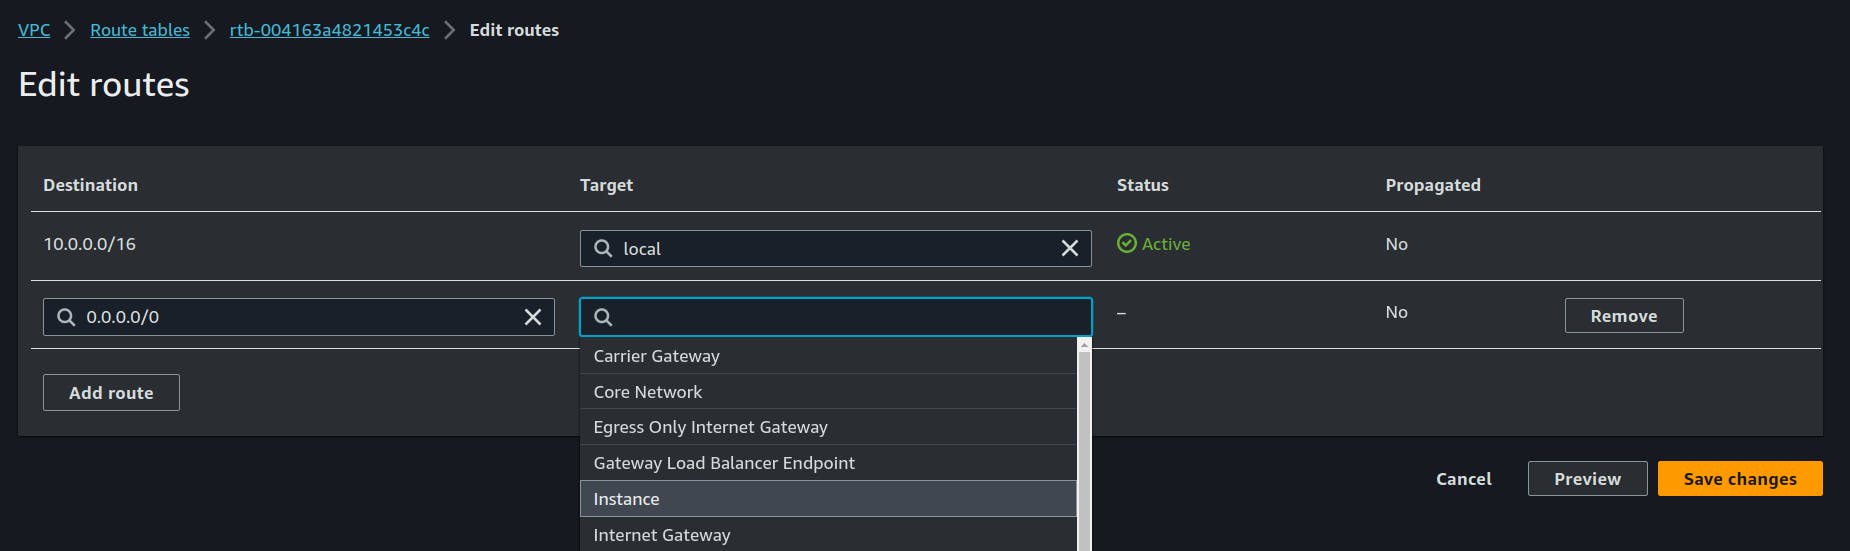
But we have a problem we don't have access to the internet yet we will have to define internet access in the private Route Table via Instance M0.
if we try pinging google.com we can't yet!

That's it now it should work right?
let's check

Wait what it still doesn't work? but why
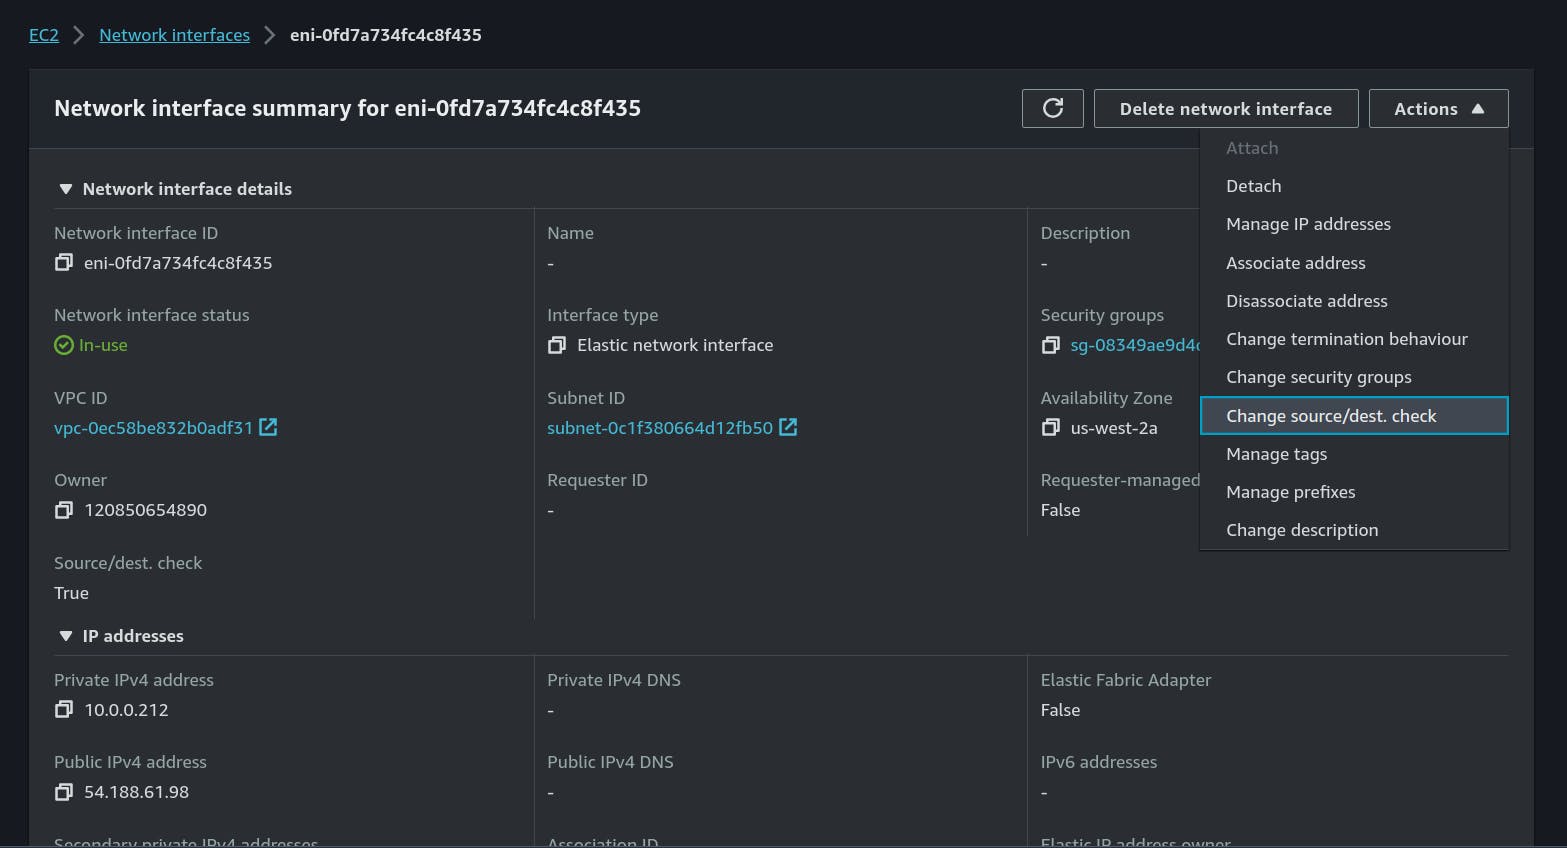
we have to disable the Source/Destination check, then it will work and our private machine will have access to the internet.
10.Disable Source/Destination Check
what is even this? basically, this means that the instance must be the source or destination of any traffic it sends or receives. all instances have this enabled by default our source and destination are not the same so that's why we can't access the internet yet we have to disable this service.

That's it now it's all done :D
Let's try once again !

HURRAY We can connect to a machine in a private subnet having no Public IP using a NAT instance and it has internet access also.
Whatever we did until now can we automate using infrastructure as code tools like Terraform, pulumi, etc.
yup, you heard it right lol, still we understood the internal working by doing it the hard way so yeah! BYE KEEP LEARNING
If you would like to follow me here they are: